











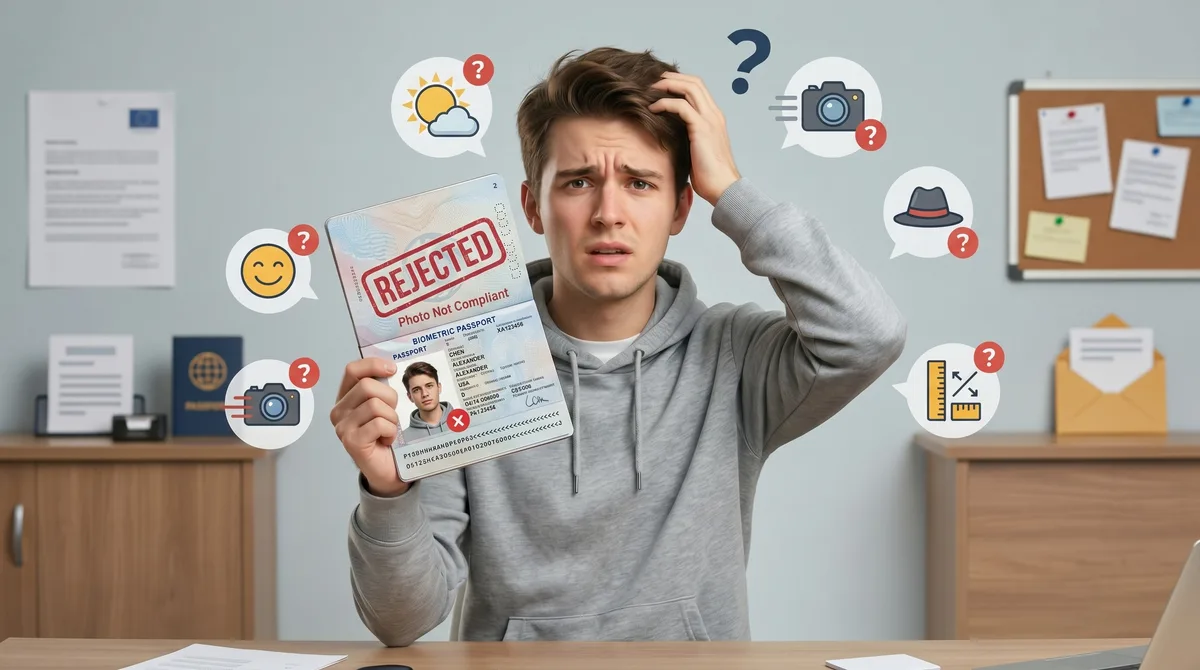
A rejected passport photo costs more than a retake. It can delay your application by weeks, and in most countries the application fee is not refunded when the photo fails. The frustrating part is that almost every rejection comes from a short list of fixable mistakes, and you can catch all of them before you submit. Ten causes account for the large majority, and each one below comes with the fix.
How you find out your photo was rejected
For paper applications, you usually receive a letter or notice from the passport office explaining that the photo did not meet requirements. Many offices do not tell you which rule you broke. The notice may simply say “photo not acceptable,” which is why the checklist below matters.
For digital submissions, the portal often rejects the file instantly: the upload widget refuses the file, or the application is returned days later with a status saying the photo is invalid. Either way, the fix starts with identifying which of the ten problems below applies to your photo.
1. Wrong size for your country
The size trap. No two countries share the same photo dimensions, and they are not interchangeable. A US photo is a square 2 × 2 inches (51 × 51 mm). Most of Europe, the UK, India, and Australia use a portrait 35 × 45 mm. Bangladesh uses 45 × 55 mm, Canada uses 50 × 70 mm, and China uses 33 × 48 mm. Submitting a 35 × 45 mm photo for a US application, or the reverse, guarantees rejection.
Crop to spec. Crop to your country’s exact dimensions, not “close enough.” Check the official spec for your country on the all-countries requirements page, then export the photo at that size. If the portal asks for pixels rather than millimetres, convert at 300 DPI: 35 × 45 mm becomes 413 × 531 px, and 2 × 2 inches becomes 600 × 600 px.
2. Wrong background
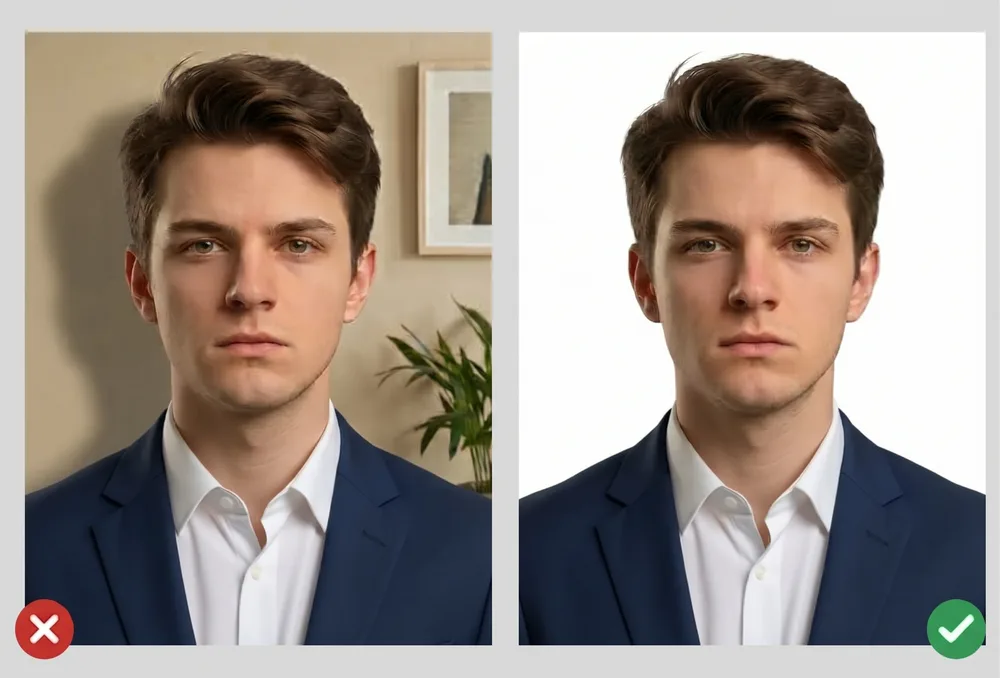
What trips it up. The background must be plain and uniform: no patterns, no objects, no other people, and no shadow. But “plain white” is not universal: the US wants white or off-white (not pure #FFFFFF), the UK wants cream or light grey for paper applications, India enforces pure white, and New Zealand requires a non-white background. Using the wrong shade is as fatal as using a cluttered wall.
Clear the frame. Stand 1–2 feet from a blank wall with no frames, shelves, or plants. Match the exact shade your country requires. If the wall is uneven or the wrong color, use background removal to replace it with the correct plain color.
3. Head too small or too large in frame
Framing is measured, not guessed. Countries regulate how much of the frame your head occupies, measured from chin to crown. The US requires 1–1⅜ inches (50–70% of frame height); the EU/Schengen rule is 70–80%; India’s digital spec wants 80–85%. A photo that is framed too loose (head too small) or too tight (top of head cut off) is rejected even when the overall size is perfect.
Re-crop to the head-height band. Crop so your chin-to-crown measurement falls inside your country’s range. Leave a small margin above the head and below the chin, keep the head centered, and make sure the full top of your hair is visible. The cropping tool’s on-screen guide shows the exact head-height band for your country.
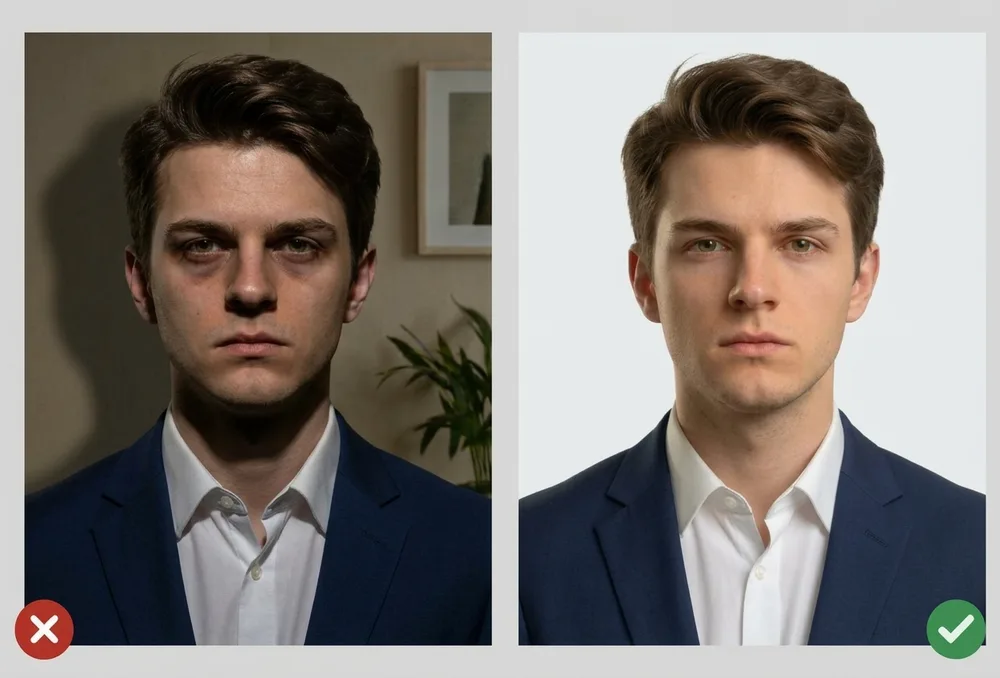
4. Shadows on the face or background
The usual culprit is the ceiling. Harsh overhead lights and flash create shadows under the eyes, nose, and chin, and a shadow cast on the wall behind you is an automatic fail. Shadows obscure facial features, which defeats the point of a biometric photo.
Move the light. Shoot in soft, even natural light near a window on an overcast day. Face the light source directly, stand a foot or two off the wall so your shadow falls away from the frame, and avoid mixing window light with overhead bulbs. If the background still shows a gradient or shadow, background replacement fixes it.
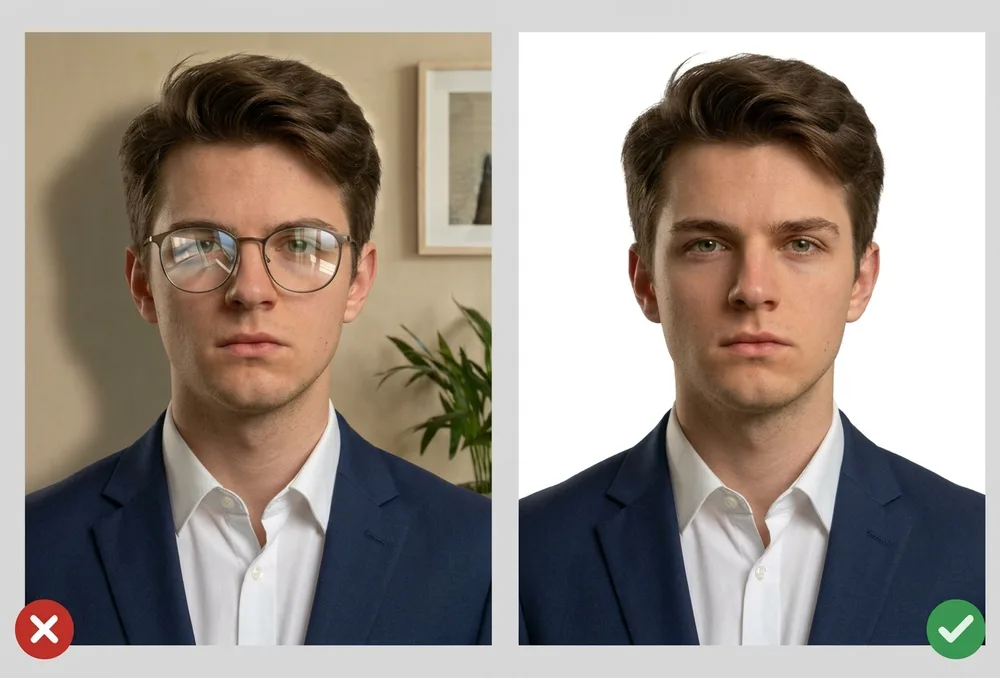
5. Glasses and glare
Why lenses fail. The US has banned glasses in passport photos since 2016. The UK and Schengen countries allow them only when there is no glare, no tint, and the eyes are fully visible, which rules out most real-world shots since lenses reflect windows and flash. Frame edges crossing the eyes also cause failures.
Shoot without them. Take the photo without glasses if you can. If you must wear them, shoot at an angle where no light reflects in the lenses and confirm both eyes are clearly visible through the glass. Anti-reflective coatings help but do not guarantee acceptance.
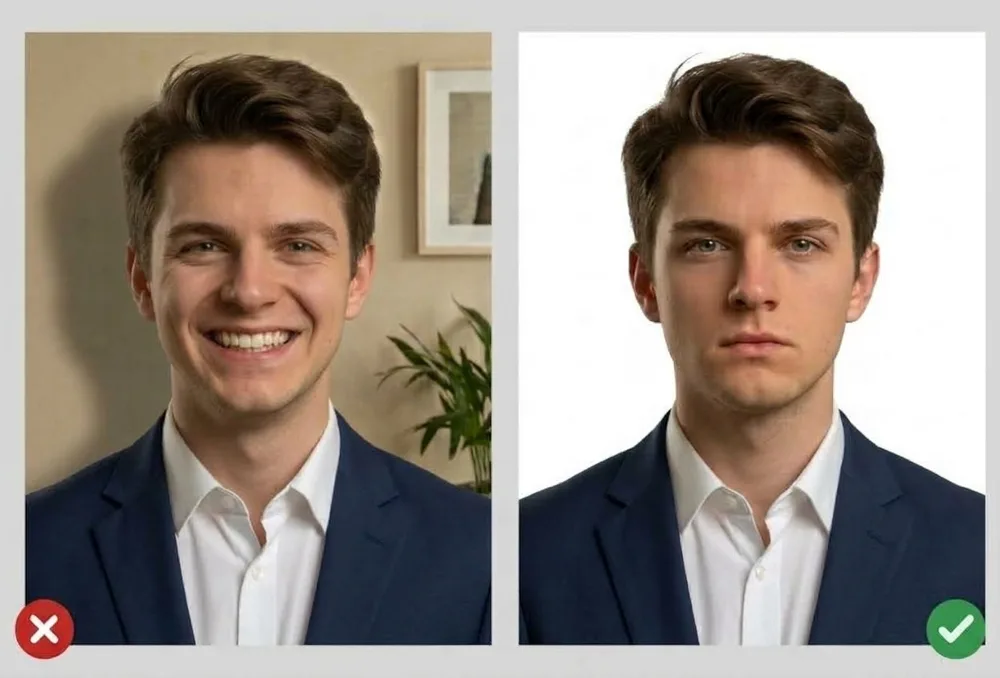
6. Smiling, open mouth, or closed eyes
A grin changes the geometry. Countries require a neutral expression: mouth closed, no smiling, no frowning, eyes open and looking at the camera. A grin shifts your facial geometry enough to break face-matching at the border. Blinking, half-closed eyes, and looking away are equally rejected.
Neutral, and shoot a burst. Look straight into the lens, keep your mouth closed with a relaxed face, and both eyes fully open. Take 10–15 frames and pick the one where your eyes are wide open and your head is level. Blinking is invisible at thumbnail size but obvious at full resolution.
7. Blurry, grainy, or low-resolution image
Detail is the whole point. Soft focus, motion blur, and digital noise hide facial detail. Portals also enforce minimum pixel dimensions, so a small or heavily compressed image fails the sharpness check even if it looks fine on a phone screen.
Steady, rear camera, no upscale. Use the rear camera, not the selfie lens. Brace the phone on a stack of books or a tripod, use a timer, and shoot near a window so the ISO stays low. Export at 300 DPI for prints (600 DPI where specified) and never upscale a small image. Retake it instead.
8. Photo older than 6 months
Authorities compare your photo to your face at the border, so it must reflect how you look now. Most countries require a photo taken within the last 6 months; the UK requires one from the last month. Children change fastest, so a photo from a year ago will not match.
Retake the photo shortly before you apply. If your appearance has changed significantly, whether that is a new hairstyle, beard, glasses prescription, weight change, or recent surgery, retake it regardless of the date. There is no downside to a fresh photo.
9. Edited, retouched, or AI-altered photo
Skin smoothing, whitening, blemish removal, background cloning, and AI face changes all alter your appearance. GOV.UK states a digital photo must be “unaltered by computer software,” and most countries follow the same principle: the photo must be an accurate, unmodified likeness. Even subtle “auto-enhance” filters can trigger rejection.
Disable beauty modes and filters before shooting. The only edits that are permitted are mechanical ones: cropping to size, resizing, correcting brightness, and replacing the background with a plain color. Do not reshape the face, smooth skin, or change eye color.
10. Digital file in the wrong format or over the KB limit
Portals check the file before a human sees it. Digital portals run automated checks on file format, pixel dimensions, and file size. DS-160 needs a square JPEG between 600×600 and 1200×1200 pixels under 240KB; India’s Passport Seva needs exactly 630×810px between 10 and 250KB. iPhone HEIC files are rejected almost everywhere, and a 4MB phone photo will not upload to a portal with a 240KB ceiling.
The specs differ so much between countries that a file that passes one portal fails the next:
| Portal | Pixel dimensions | File size | Format |
|---|---|---|---|
| US DS-160 / DS-11 | 600×600 to 1200×1200 (square) | Under 240KB | JPEG |
| India Passport Seva | Exactly 630×810 | 10–250KB | JPEG |
| UK digital photo | At least 600 wide × 750 tall | 50KB–10MB | JPEG or PNG |
| Printed photo (most countries) | 35×45mm at 300 DPI = 413×531px | Not applicable | Print only |
Note the UK allows up to 10MB while the US caps at 240KB, so a file exported for one will be rejected by the other.
Convert, resize, compress. Convert HEIC to JPEG, resize to the portal’s pixel dimensions, and compress below the KB limit. Our compression tool does all three without visible quality loss. Check the exact spec on your country’s requirements page before uploading, and never submit a scanned print: scanning a photo degrades sharpness and usually fails the quality check.
Pre-submission checklist
Run through this before you submit:
- Exact size for your country (not a neighboring country’s spec)
- Plain background in the required shade, with no objects and no shadow
- Head height inside the allowed chin-to-crown range
- Neutral expression, mouth closed, both eyes open
- No glasses, or lenses with zero glare
- Soft even light, no shadows on face or wall
- Sharp, in-focus image at the required DPI
- Taken within the last 6 months
- No filters, smoothing, or AI edits
- Digital: correct format, pixel size, and KB limit
Retaking after a rejection
If you spotted the problem, you do not need a studio to fix it. Upload your photo to the free passport photo tool and it will auto-crop to your country’s exact dimensions, set the correct background, and position your face inside the head-height guide. It all runs in your browser, so the photo never leaves your device. Then re-run the checklist above and submit with confidence.
Frequently Asked Questions
Why was my passport photo rejected?
The most common reasons are wrong size for the country, shadows on the face or background, glasses or glare, a smiling or open mouth, head too small or too large in frame, a blurry image, a photo older than 6 months, visible retouching, and digital files that exceed the portal's format or KB limit.
What do I do if my passport photo is rejected?
Take a new photo that fixes the specific problem listed in your rejection notice, then resubmit your application with the new photo. You do not need to restart the whole application in most cases, but check your country's guidance, because some countries require a fresh form.
Do I get a refund if my passport photo is rejected?
No. Application fees are not refunded when a photo fails, and you may have to pay the fee again if you start a new application. Fixing the photo before you submit is far cheaper than resubmitting.
Can I reuse the same photo after it gets rejected?
No. A rejected photo has already been marked as non-compliant. Retake it with the specific fix applied. Reusing the same image, or lightly editing it, will fail again.
How do I know my passport photo is compliant before submitting?
Check four things: exact size for your country, plain background with no shadows, head height inside the allowed range, and file format plus KB limit for digital uploads. A cropping tool that enforces your country's spec removes the guesswork.
Can a passport photo be rejected for looking edited?
Yes. Skin smoothing, filters, background cloning, and AI face changes alter your appearance and cause rejection. GOV.UK requires a digital photo to be unaltered by computer software, and most countries follow the same rule. Only cropping, resizing, and background replacement are allowed.
Why was my digital passport photo rejected on the upload portal?
Usually the file is too large, in the wrong format, or the wrong pixel size. DS-160 needs a square JPEG between 600×600 and 1200×1200 pixels under 240KB, India's Passport Seva needs exactly 630×810px between 10 and 250KB, and the UK accepts anything at least 600×750px up to 10MB. iPhone HEIC files are rejected almost everywhere. Convert to JPEG, resize, and compress before uploading.